

We made a basket, only one each.

Let me show you how we did it:

First you need a piece of sticky florist tape.

I did cut a piece 50 cm and cut that piece lenghtwise in tree pieces.

Wrap that around a florist wire of 7mm.

Saw a circle from thin wood and dril holes in it not to far apart from eachother, make sure it is an uneven number.
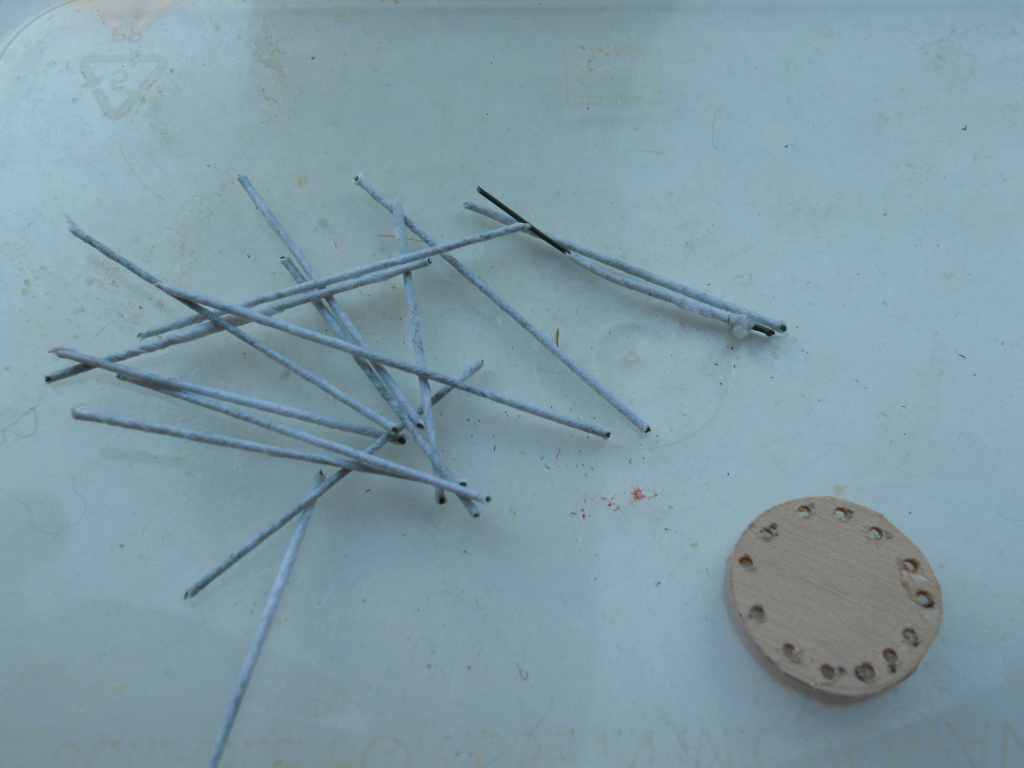
Cut the wire a bit longer than you want your basket to be.

Glue the wire in the holes.

Weave small rope or cotton tread around the wire.

If you want your basket to be wider on top bent it before weaving.
Finish of by making handels from a piece of rope or not and make a braid to decorate the top and hide the wood on the bottom.
We used tacky glue because that doesn't make stains when dryed.
On the picture the glue is still wet.

A lot of work, but they turned out pretty cute, don't you think?

I hope you like this tutorial .
If you have questions, please ask, i'll be glad to help.


19 opmerkingen:
They are very cute!!! Your tutorial is very helpful. =
Te han quedado preciosos,muchas gracias por el tutorial!!!
Explicado así parece hasta sencillo. Te han quedado fantásticas.
Besos, Narán
Beautiful Baskets! Thanks for sharing.
Hugs.
This is great! I will have to try this soon. Thanks for sharing!
Nice result. May I ask you how did you finsh so nicely because i have some baskets started a very very long time ago but I could not remeber how I am supposed to finish, maybe I can post teh pictures on my blog and you can give me an advice... thaks by advance ffor your help,
Doei, claude
Muy bien, y muy bien esplicado!!!!
Besos.
These baskets are great lol i tried making one and between getting glue in it and pulling it i am surprised i have any HAIR left hehe. When i was finished ( finely ) I was left with a tiny basket lol. So great work on these. Greetings Maria
Muchas gracias por el tutorial, te han quedado geniales.
Feliz fin de semana
besitos ascension
brava molto carino.ciao Erika
I am going to learn to do this I have the materiasl!!Thanks for sharing such an easy tut!!
Gracias por el tutorial. Espero que si las hago me queden tan bien como a ti. Un saludo, Eva
Thanks girls for this nice reactions and sweet words.
Claude,to finish of when your reached the desired hight you have to put glue at the ends on the inside and outside.When the glue is dry cut of the wire.Hide the ends with a braid.
Succes
Hugs
Maria
That is so cool! I love the way you explained it. It seems like a lot of fun.
hugs,
Caroline
I love these! Thanks for the tutorial!
Thank you for sharing this tutorial with us. I will definitely want to try this. I love weaving baskets :). It is my mini flavour of the month at the moment.
I think the trunk you made is a great success.
con su permiso me guardo su tutorial ,para poder poner en practica y hacer unas preciosas cestas.
Gracias por compartir.
Besos y saludos .Loly
with your permission I'll keep this tutorial in order to put into practice and make some beautiful baskets. Thanks for sharing. Kisses and greetings. Loly
con su permiso me guardo su tutorial ,para poder poner en practica y hacer unas preciosas cestas.
Gracias por compartir.
Besos y saludos .Loly
with your permission I'll keep this tutorial in order to put into practice and make some beautiful baskets. Thanks for sharing. Kisses and greetings. Loly
Unas cestas preciosas. Gracias por compartir el tutorial. Besos
Een reactie posten